Table of Contents
Hot Recommendations
Get a Free Quote Instantly!
Talk to Our Sales Team Now.
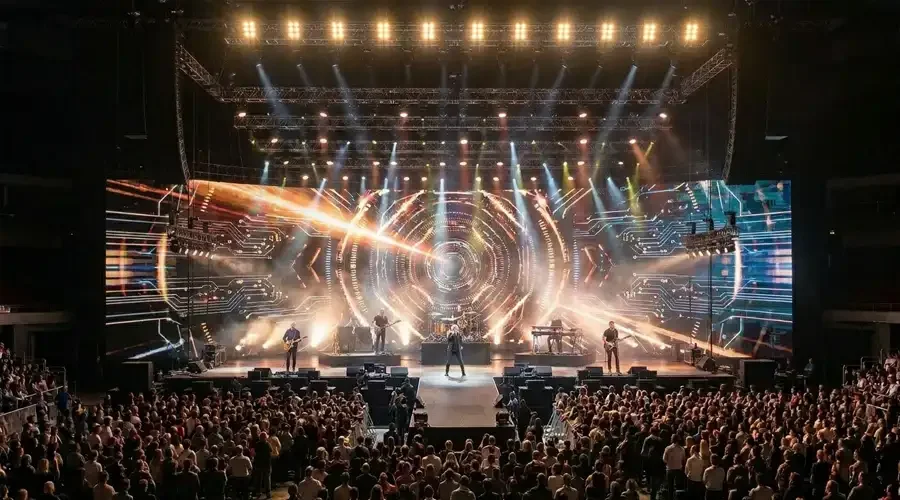
Outdoor LED walls are transforming public spaces, advertising, and entertainment venues. With their brightness, durability, and dynamic visual appeal, they bring vibrant content to life in almost any environment. Whether highlighting brand promotions, broadcasting live events, or enhancing architectural façades, installing an outdoor LED wall can greatly elevate the visual experience. This article offers a comprehensive, step-by-step guide to planning, installing, and maintaining a high-impact outdoor LED wall.
1. Assess Your Needs and Goals
1.1 Define Purpose & Audience
Clarify why you want an outdoor LED wall:
Advertising and promotions: billboards, menus, special offers
Live events: sports, concerts, public gatherings
Wayfinding and information: transit hubs, campuses, parks
Aesthetic enhancement: branding, artistic visuals, architectural integration
Knowing your purpose helps determine the size, resolution, content strategy, and location of the installation.
1.2 Select Ideal Location
Key factors to evaluate:
Visibility: Choose a high-footfall or high-traffic spot—buildings, plazas, stadiums, storefronts
Ambient-lighting conditions: Consider sun exposure and glare. Direct sunlight demands higher brightness displays
Viewing distance: For distant viewers (e.g., streets or stadiums), lower pixel pitch is acceptable. Close-up viewers need finer pixel pitch for sharp visuals
Structural support: Confirm the wall or frame can support the weight of the screen and withstand wind, rain, and other outdoor elements
1.3 Establish Budget & Timeline
Account for:
Screen panels, power supplies, installation hardware
Structural modifications, weatherproofing, electrical wiring
Content creation tools, scheduling software, maintenance plan
Permits and local regulations
Plastic wrap around costs and timelines upfront helps prevent delays or unexpected expenses.

2.1 Pixel Pitch and Resolution
Pixel pitch refers to the center-to-center distance between LEDs:
0.9–2.5 mm: For close-up viewing (e.g.,interactive walls, storefronts)
2.5–6 mm: For mid-range distances (e.g., public plazas, stadium concourses)
6 mm+: For long-distance viewing like highway or building-mounted screens
2.2 Brightness and Contrast
Outdoor screens need high brightness, typically 4,000–6,500 nits, to remain visible in daylight. Contrast ratio is also critical; a high ratio ensures vibrant text and sharp visuals both day and night.
2.3 Cabinet Design and Weatherproofing
LED displays come in modular cabinets. For outdoor use, look for:
IP65 or IP67 ratings: Sealed against dust and rain
Anti-corrosion frames: Aluminum alloy frames treated for rust prevention
Effective thermal management: Built-in fans or heat sinks to regulate temperature
2.4 Power and Redundancy
Choose power supplies with:
Over-voltage and surge protection
Redundancy to prevent single-point failures
Install an uninterruptible power supply (UPS) to guard against voltage drops or outages, especially in unreliable power grids.
2.5 Control System and Connectivity
A reliable control system enables real-time management:
Wired: Ethernet/RJ45 is stable and secure
Wireless: Wi‑Fi or cellular backup for redundancy
Include signal amplifiers (e.g., Cat6 extenders) for large screens. The control software should support scheduling, playlists, remote diagnostics, and live-feed integration.
3. Prepare the Site
3.1 Structural Survey
Have a professional evaluate:
Building façade or freestanding structure load capacity
Wind load, seismic potential, and static/dynamic weather exposure
Safe anchoring points, drainage, and protective features
3.2 Electrical Planning
An electrician should:
Provide dedicated power circuits with surge protection
Install an emergency shutoff switch
Design cable corridors to avoid tripping hazards or damage
3.3 Permits and Regulations
Check local building codes and ordinances, which may require:
Zoning approval for digital signage
Light emission standards (brightness or hours of operation)
Structural inspection and certifications
3.4 Ground Preparation
For freestanding installations:
Excavate and pour concrete foundations
Anchor posts or frames securely
Add conduit pathways for cables

4. Installation Process
4.1 Frame Setup
Assemble the mounting structure per engineering design
Use level, plumb, and square checks at each step
Weld or bolt frame sections, followed by anti-corrosion coatings
4.2 Cabinet Mounting
Start from the bottom row, working upward
Secure each cabinet on 4+ mounting points to ensure alignment
Connect power and data cables topology-wise (daisy-chain or hub-based)
Test each row before moving to the next
4.3 LED Panel Connection
Connect data cables according to the controller type
Daisy-chain power supplies with proper fusing or inline protection
Clip or fasten panel edges to prevent water ingress
4.4 Initial Power-Up and Calibration
Perform dry-run power-up
Check voltage on each supply, monitor temperatures
Run calibration software to adjust brightness, color, and uniformity
Set daylight and night modes—use light sensors for automatic switching
5. Configure the Control System
5.1 Software Setup
Install and configure:
Playlist scheduler for images, videos, live feeds
Time-of-day triggers (e.g., signage in the morning vs. evening)
Remote restart and diagnostics
Use centralized content management if multiple screens are involved.
5.2 Connectivity and Backup
Ensure wired connection is primary; set cellular as fallback
Monitor signal strength and latency
Schedule periodic ping tests and alert triggers
5.3 Remote Monitoring
Look for features like:
Temperature and humidity readings
Fan speed and power supply stats
Remote reboot via networked smart plug
Alerts via email/SMS reduce downtime
6. Testing and Fine-Tuning
6.1 Image Quality
Display test patterns to verify pixel mapping and color uniformity
Use test videos to check motion smoothness and frame rate
6.2 Brightness Across Times
Verify high brightness during bright sunlight
Confirm transitions to low-bright mode after dark
6.3 Audio Calibration (if applicable)
Test speaker placement and volume calibration for required coverage
Shield speakers from weather or apply waterproof cabinets
6.4 Safety and Stability Checks
Ensure cables routed away from pedestrian access
Inspect electrical connections and grounding
Perform visual checks on anchoring points

7. Launch and Ongoing Maintenance
7.1 Content Rollout
Soft-launch with low-intensity content. Monitor performance across:
Peak hours
Weather conditions
Viewer feedback
7.2 Routine Inspections
Monthly checks include:
Cleaning of panels (dust, bird droppings)
Inspection of fans and heat sinks
Moisture seals on cabinet edges
Fasteners and mounting points
7.3 Software and Firmware Updates
Install updates during low-traffic hours
Back up content and configurations regularly
Log changes and track device health
7.4 Troubleshooting Quick Guide
Common issues:
Panel dark spots: check fused power cables or module failure
Network loss: analyze wiring, router, or signal strength
Flicker: test power line quality, add active filters
8.1 Interactive Features
Integrate cameras or sensors to enable:
Touch-free gestures for public displays
Audience analytics: crowd size, dwell time
Proximity-triggered content
8.2 Live Streaming
Embed outdoor cameras to:
Broadcast live events, traffic updates, or social media feeds
Use bearer aggregation for mobile broadcasts in remote locations
8.3 Dynamic Scheduling
Automate content transitions (e.g., weather updates, news tickers)
Use day-of-week/time-of-day variations to suit audiences
Integrate special themes for holidays or local events
8.4 Energy Efficiency
Automated brightness dimming after hours
Use LED cabinets with low standby consumption
Solar panels and battery backup for remote or green installations
9. Real-World Use Cases
9.1 Retail Storefronts
Outdoor walls showcasing product demos, daily deals, and interactive elements draw foot traffic and enhance brand identity.
9.2 Public Event Venues
In parks and stadiums, LED walls display live action, advertisements, social media highlights, and emergency notices.
9.3 Transportation Hubs
Bus and train stations use dynamic signage to show arrivals, departures, delays, and promotional announcements.
9.4 City-Wide Installations
Used by local governments for civic reminders, event information, public safety visuals, and community-building art.
10. Cost Factors and Budget Planning
Item | Typical Range |
LED cabinets (per sqm) | $800–$2,500 |
Structural frame & support | $300–$800 |
Electrical & cabling | $150–$500 |
Power system (UPS, filters) | $200–$600 |
Control & connectivity | $300–$1,200 |
Installation labor | $200–$1,000 |
Content creation/setup | $500–$2,000+ |
Totals vary from $30,000 (small wall) to over $200,000 (large, high-end installations). Modular design supports future scaling.

11. Maximizing Return on Investment
Engaging content: change visuals regularly to keep attention
Cross-promotions: collaborate with brand partners
Event tie-ins: timed promotions with local happenings
Data insights: viewership metrics help refine content and justify investment
12. Safety, Compliance, and Environmental Considerations
Electrical safety: Ground fault circuit interrupters (GFCI), emergency cut-offs
Light pollution: Shielding and scheduling to avoid disturbing residents
Structural engineering: Regular inspections, especially in high winds or seismic zones
End-of-life recycling: LED modules are recyclable
Energy usage: Use efficient components and power-saving schedules
Installing an outdoor LED wall is a multifaceted project combining technical know-how, design acumen, content strategy, and ongoing care. When done well, it becomes not just a digital display but a centerpiece of brand exposure, user engagement, and community integration. By carefully planning from location and structural design to installation, calibration, and maintenance—and continuously refining your content—you ensure a powerful, reliable, and visually stunning addition to any outdoor space. Whether in retail, entertainment, transportation, or civic environments, the impact of a properly executed outdoor LED wall can be lasting and transformative.
Frequently Asked Questions (FAQs)
1. How long does an outdoor LED wall last?
A high-quality outdoor LED wall typically lasts between 50,000 to 100,000 hours, depending on usage, brightness levels, and weather conditions. That means it can operate effectively for 5 to 10 years or more with proper maintenance. Choosing components with better heat dissipation and weather protection greatly extends lifespan.
2. Can an outdoor LED wall be used in heavy rain or snow?
Yes, outdoor LED walls are designed to withstand all types of weather, including rain, snow, and extreme temperatures. To ensure safety and performance:
Look for IP65 or higher ratings (dust and water resistance)
Install proper sealing, drainage, and anti-rust coatings
Regularly inspect for moisture intrusion or corrosion around edges and connectors
3. What kind of maintenance is needed for an outdoor LED wall?
Outdoor LED walls require routine monthly and seasonal maintenance:
Clean the screen surface using soft, non-abrasive cloths
Check for dead pixels or dimming spots
Inspect mounting brackets, power supplies, and weather seals
Update control software and calibrate colors if necessary
Preventive maintenance keeps the display looking sharp and operating reliably.
4. How much power does an outdoor LED wall consume?
Power usage depends on screen size, brightness, and usage time. On average:
Per square meter, an LED wall may consume 200–800 watts
A large 20 sqm wall running full brightness can draw 4,000–10,000 watts per hour
Use energy-saving features like auto-brightness adjustment, and consider off-peak content schedules to manage electricity costs.
5. Can I display live video or integrate it with social media?
Absolutely. Most modern control systems support:
Live HDMI or SDI feeds from cameras or broadcast sources
Streaming integration with platforms like YouTube or Facebook
Real-time display of hashtags, user posts, or comments
Interactive content is a great way to engage audiences and boost attention, especially in events or promotional campaigns.


If you are interested in our products, please contact us promptly
Reach out to our sales team to explore customized solutions that perfectly meet your business needs and address any questions you may have.
Email Address:info@reissopto.comFactory Address:Building 6, Huike Flat Panel Display Industrial Park, No. 1, Gongye 2nd Road, Shiyan Shilong Community, Bao'an District, Shenzhen city , China
whatsapp:15217757270